2.10.7.2.1. Getting Started
Overview
PTA payments made in Sage 300 CRE automatically display in TimberScan GO as soon as the payment is received into the AvidPay network. In TimberScan GO, after a payment is created, users with the appropriate permissions, can approve, void or place payments on hold. A Prepaid Information Advice (PIA) is automatically attached to each paid invoice, referencing the check number in Sage, so you can view an image of the payment before it is completely processed. Later, after the payment has cleared, a Proof of Payment is automatically attached to each payment record. Payment images flow through to TimberScan inquiries and dashboards, including AIM Search, to give you multiple ways to access your payment data.
Prerequisites
TimberScan Go version 1.6.4.1336 or higher and TimberScan (server) version 3.8.7.150 or higher are required. After your AvidPay integration purchase, we automatically revise your TimberScan license to reflect the addition.
Configuration
Configuration is done in TimberScan GO where we log in with you as the administrator. The AvidPay configuration selection is only available via the administrator login; it is not available logged in as a user with administrator rights.
On the credentials tab, you can create a new configuration, or edit or delete an existing one. The Configuration name and Avid Org ID prefill from the AvidPay Portal setup and the PTAUserConfig.exe.config file (located in the C:\avidxchange\printtoavid folder) on the designated AvidPay workstation.
Enter your AvidPay portal credentials here. If you have multiple company portals, you will need to establish a configuration for each one.
 If you change credentials in the AvidPay portal, you will need to enter the new credentials here in GO.
NOTE: One company must be checked as the Default Account.
Click on the Company mapping tab. For each company, select the Add button and choose a bank from the Account drop-down list. Enter the bank routing number and select Save. The bank will display with the name, last four digits of the bank account number and the entered routing number. The four digits of the bank account as well as the routing number in GO should match the data in the PTA configuration file (shown above). Repeat the setup for each bank account that is used in this company for AvidPay.
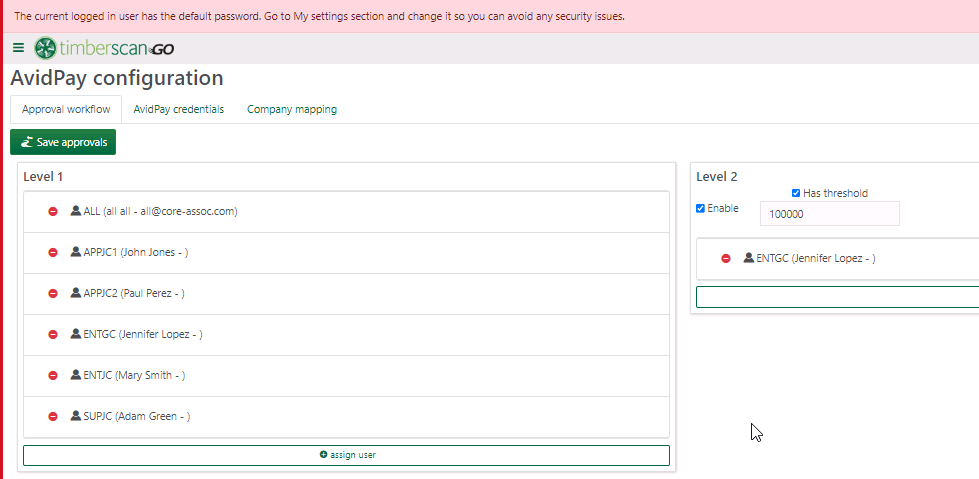
Here is where you also set up approval workflows to approve payments. For Level 1, select from a list of users who have been given the permission to approve payments (see below). You can select multiple approvers.
Establishing a level 2 in a workflow is optional. After a level 1 user has approved the payment, the payment will automatically enter the approval queue for any level 2 approvers. You can set up an optional threshold so only payments over a certain amount require level 2 approval.
User Permissions
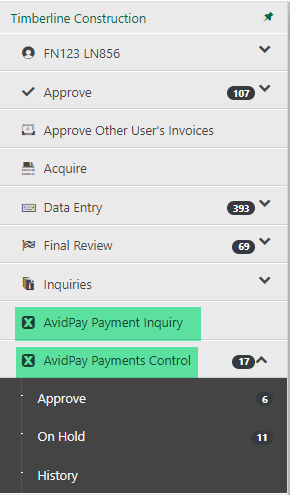
You will need the appropriate TimberScan permissions to access either (1) AvidPay Payments Control or (2) the AvidPay Payment Inquiry or both. These permissions can be added to a role or to individual users in TimberScan admin > Maintenance > User Maintenance.
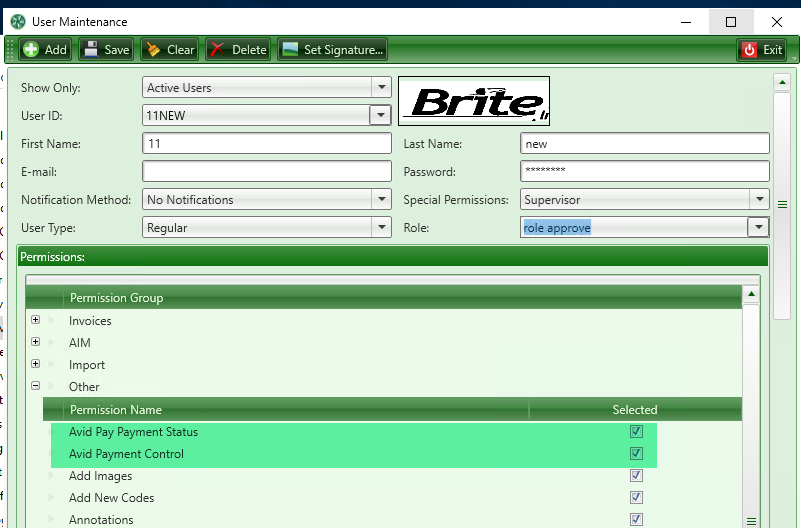 .
.The Avid Pay Payment Status permission gives you access to the AvidPay Payment Inquiry in TimberScan GO. Granting this permission also gives the user the ability to view payments in the standard TimberScan inquiries as well as the dashboards and AIM.
The Avid Payment Control permission gives a user access to approve, void or place payments on hold as well as view the history of any payment.