2.1.4.6.2.1. Import Invoices to Print

There is a feature under TimberScan Reports that allows the user to print images based on a Sage 300 CRE report design. For example, a user could modify Sage 300 CRE's check register report to bring the data into TimberScan to create a check register with attached invoice images.
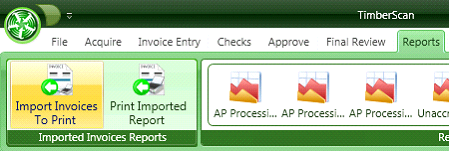
This feature is found in TimberScan by selecting Reports > Import Invoices to Print. Its purpose is to be able to print images based on a reort that is run in Sage 300 CRE.
Instructions:
There is a two - step process to create a report with images:
First, a report is created or modified in Sage to output the data in a comma-delimited format.
Second, the data is imported into TimberScan and printed with the images attached.
1. Create or Modify a Sage Report Design
Select the Sage CRE 300 report you'd like to modify or create a new report.
For example, you may want to attach invoice images to the current WIP report for customer billing. Or, as noted above, you could modify a check register to attach invoice images.
Use Sage's Report Designer module to modify (or create) a report design using the following rules:
-
Remove the Header Section of the report
-
Remove column headings
-
Remove totals
-
Remove additional rows if the report contains more than 1 row of fields
Modify or create the report design with these required fields:
-
(FIRST field) Vendor ID
-
(SECOND field)Invoice Number
-
(THIRD field)the field you want to Group the report data by (for example, for a check register you might select Bank ID; for a job cost report you might select the job ID).
-
(FOURTH field)Amount
Commas need to be entered after each of the first 4 fields as we are re-designing the report to print in a comma-delimted text field format.
Add additional fields after the 4th field to include the data you want to print on the invoice image. With the check register example, you may select to add the check number and check data; for a job report you may want to add the cost code and/or category. NOTE: There should be no commas between these additional fields.
In Report Designer > Print Controls, ensure that each field as well as the comma separators print on each line. Change tHe option on the amount field to NOT use commas.
Save the report re-design and add it to Reports menu in Sage where the report will be run.
The report design should resemble something similar to the report design below:
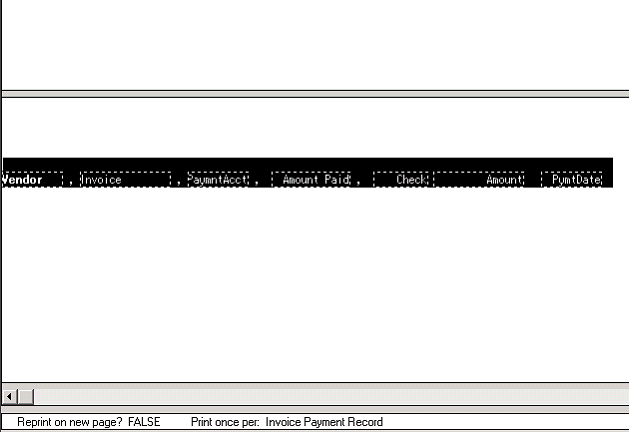
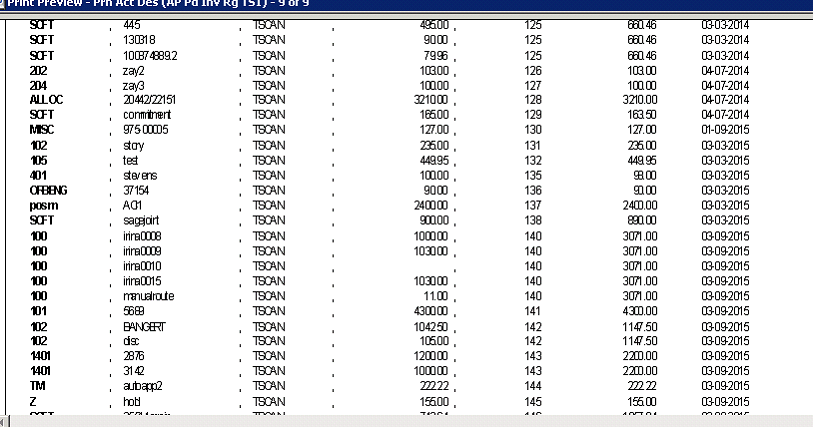
Your report printout should resemble the printout below showing vendor, invoice, bank, amount, check number, etc.
2. Process the data in Timberscan:
In Sage 300 CRE, run the report and save it as a text file
.In TimberScan, under the Reports menu, select Import Invoices Report > Import Invoices to Print:
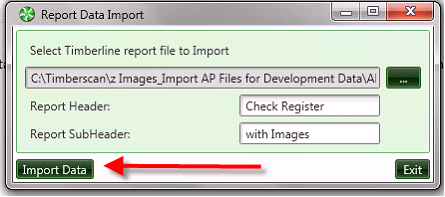
Select the text file that was just created from running the report design in Sage.
-
Enter 1 or 2 report headings (optional)
-
Select the Import Data button
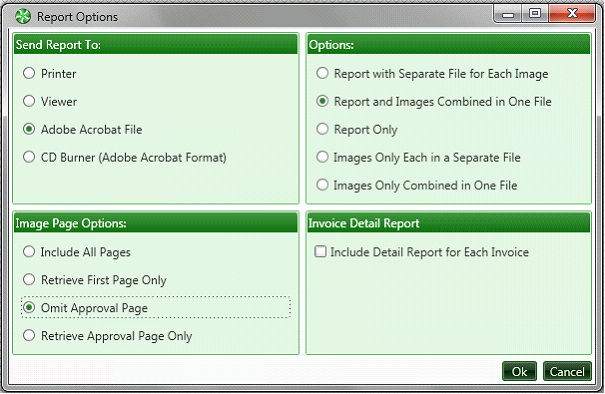
The Report Options screen displays. Make your selections and print the report.
If you would like to reprint any report, select Reports > Print Imported Report.

A screen displays listing previously imported report designs:
