2.3.1. Server Edition
Server Setup:
While the installation and configuration for Email Monitoring is handled by our technical support team, there is additional setup in TimberScan admin that is required.
System Settings
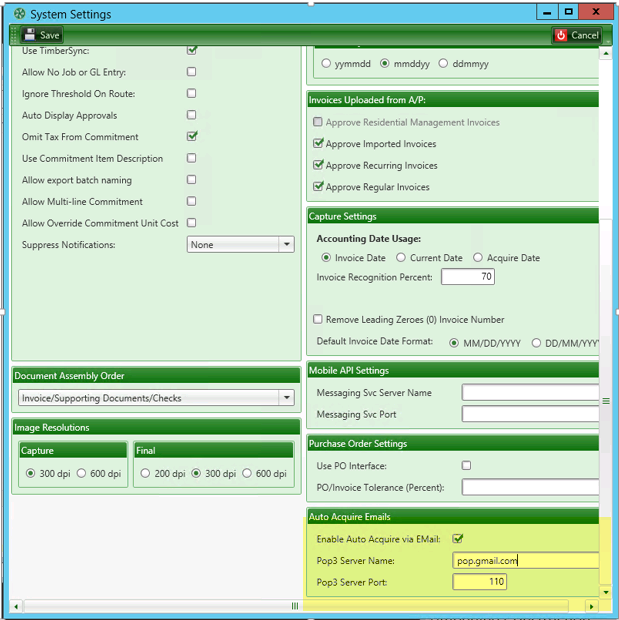
1. Open Settings > System Settings. Check the box to Enable Auto Acquire via Email and enter your Pop3 server name and port.
2. In Maintenance > User Maintenance > User Group Maintenance, enter the email settings for each Data Entry User Group where the email monitoring service will monitor incoming emails. This allows you to have multiple inboxes, if desired, one for each User Group.
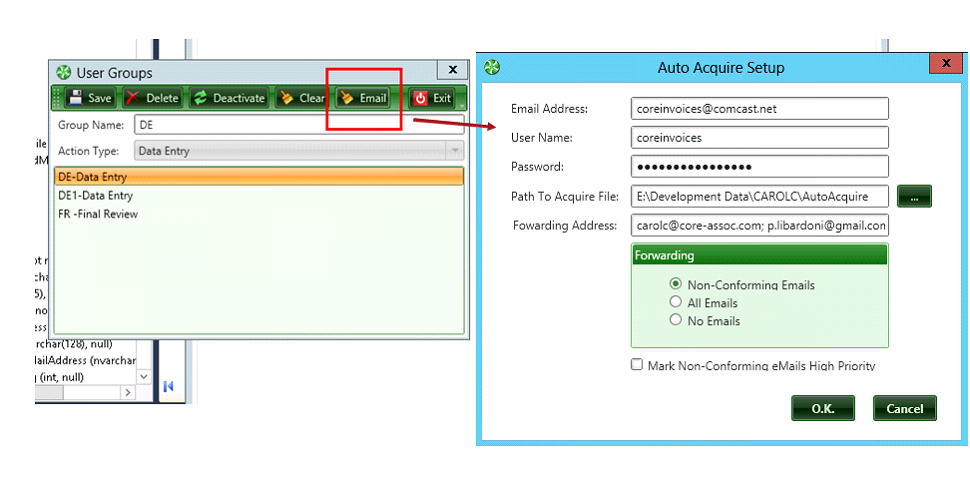
· Email address: Enter the email address associated with shared Incoming mail server to monitor for new emails.
· User Name: Enter the user name for that email address.
· Password: Enter the user password.
· Path to Acquire File: Enter the path to the folder where Email Monitoring should save the invoices that are attached to the email.
· Forwarding Address: Enter the email address you want the emails to forward to. What emails will forward to this email address are based on the following option you select. You can forward emails that do not comply to another user for manual processing. You can select to forward all or no emails:
· “Non-Conforming Emails”: Ones that either have no attachment or an attachment that is not a PDF or TIFF file. You can check the box to Mark Non-Cnforming eMails High Priority.
· “All Emails” that come into the designated inbox
· “No Emails”
NOTE: Data entry User Group setup is not necessary if you purchased Acquire Automation instead of Emal Monitoring. See the section on Acquire Automation.
A new menu option will now appear on the Acquire ribbon:
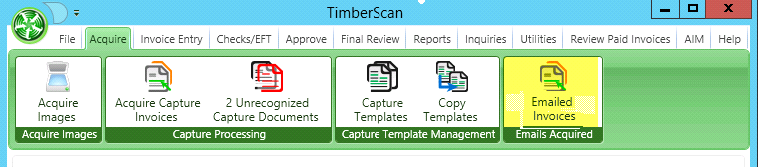
Workflow:
Selecting the Emailed Invoices button opens a list of acquired images:
.
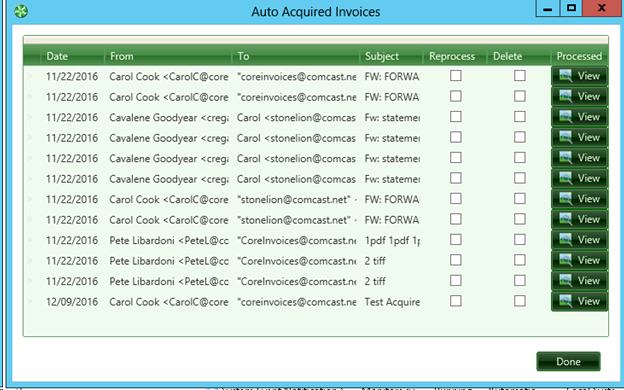
You can choose to:
Reprocess: TimberScan stores a copy of the invoice images in the database. If an invoice attachment is deleted from the folder, the image can be regenerated for acquisition. Clicking Reprocess will create a fresh copy of the attachment in the designated folder.
Delete: Clicking Delete removes the invoice image record from the database. It does not remove the invoice image from the designated folder.
Note: Only users with Supervisory or Executive privileges can see all emails. For users without those privileges, visibility is based on membership in the Data Entry user group for the specific email folder.
To acquire images, navigate to the specified folders. Drag and drop the files into the Acquire window as normal.