2.1.4.4.2. Approving Invoices
Based on your user permissions, you can do the following to an invoice in the Approval Workflow
Approve the invoice unchanged
Modify the invoice header (vendor, invoice ID, date, etc.)
Modify the invoice distribution (job, commitment, cost code, GL coding, amounts, etc.)
Reject the invoice (send it back to Invoice Entry or to another user)
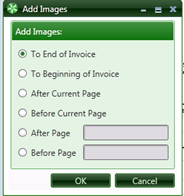
Add/remove images
Annotate images (highlight, add sticky note, etc.)
View vendor history
Hold the invoice (only you will be able to release the invoice)
Route the invoice to another person
Add comments/notes to the invoice
View other approver's notes
Email the invoice
Change the invoice type
Add a joint payee
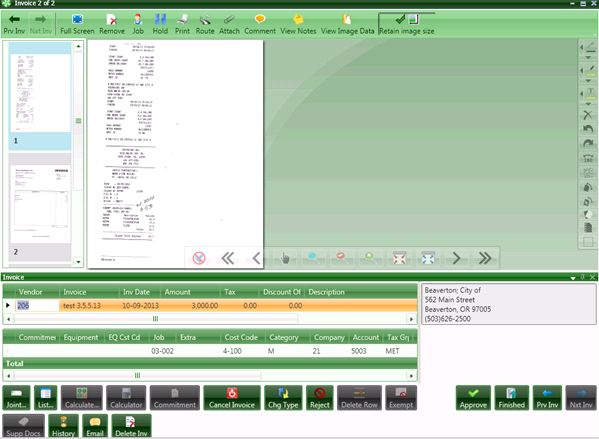
After you have selected invoices to approve, the invoices for approval will display in a screen like the data entry screen.
Approve the Invoice Unchanged:
If the invoice looks okay you can click the [Approve] button, then [Finished] button and the invoice will be routed to the next person (group) in the Approval Workflow.
Modify the Invoice:
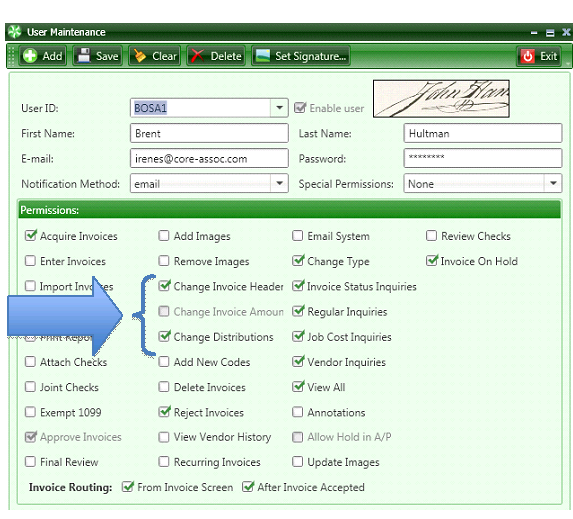
Depending upon each particular user’s permissions, he or she may or may not be able to modify the invoice information. Assuming the user has permission to change invoices, just click the mouse into the cell to be changed and either type in the information or press the [List…] button if it is active for that particular cell.
The system allows for partial coding by the data entry staff. The approver can complete the coding if data entry doesn’t know the data elements.
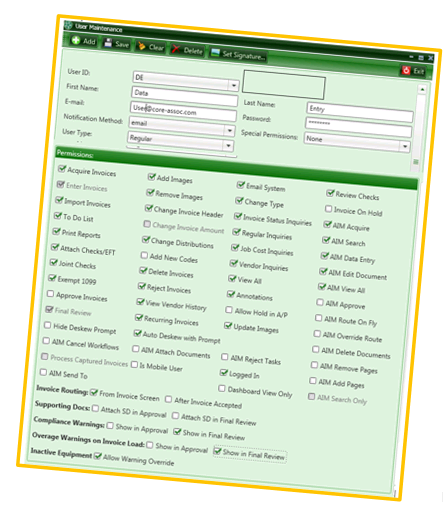
If you are not allowed to modify an invoice, you may need rights to:
Change Invoice Header
Change Invoice Amount
Change Distributions
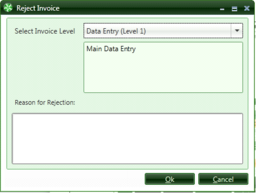
Reject the Invoice:
If you receive an invoice that should not have gone to you because it was coded incorrectly – select the [Reject] button and send it back.
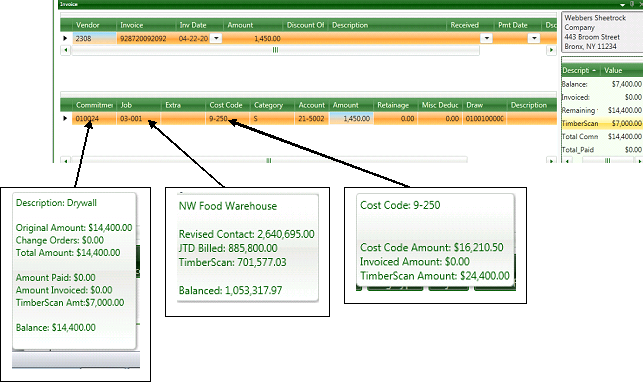
Reviewing Invoices – Hover Feature
Positioning the cursor on select fields provides additional information about the field.
An explanation of the functions of the various buttons follows.
.
Top of Screen Buttons and Controls
A. Prv Inv: Allows you to go back to the previous invoice. The icon is grayed out if you are on the first invoice in the batch.
B. Next Inv: Allows you to skip the current invoice and work on the next invoice in the batch. Icon is grayed out when you’re on the last invoice of the batch.
C. Full Screen: This expands the invoice image to cover the invoice entry grids. The caption is then changed to Detail Screen and will redisplay the grids when pressed.
D. Remove: Deletes the page you are currently viewing. You can also delete a page from by right clicking on the thumbnail.
E. Job: Runs the Job Inquiry Report. This report contains all A/P data for the job being entered from both the Timberline and TimberScan database. The report has filtering capability and the ability to view the invoice image and supporting documents. Examples of this and other reports are in the Reports and Inquiry Section
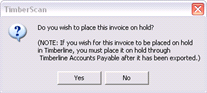
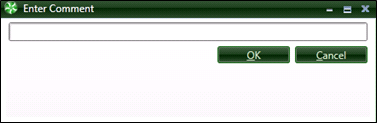
F: Hold: This will place the invoice on hold and remove it from the normal approval queue. This is useful if further information is required before the invoice can be entered. When pressed, the following message is displayed:
Pressing [Yes] will result in the Enter Comment form being displayed.
A comment is required when placing an invoice on hold.
Held invoices are accessed again selecting the Held Invoices Selection from the the Approval Menu.
G: Print: Pressing this button will send a copy of the invoice to the default printer for the workstation.
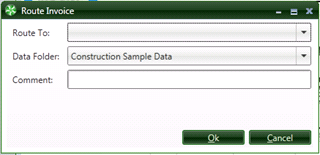
H: Route: This allows an invoice to be routed to another data entry group for entry. If multiple Sage Timberline Office data folders have been created, the invoice can be routed to another data folder. When pressed the following form is displayed:
I. Attach: Is used to add additional pages to the invoice file. When invoked it opens windows and allows you to choose the file to add. Currently only TIF and PDF files can be attached.
J.Comment: Pressing this will display the Comment form. All comments are automatically displayed for every user who subsequently views an invoice. This includes comments that are entered using other forms.
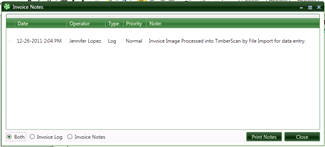
K. View Notes: This button will display any invoice comments as well as all of the system created log entries. In the Invoice Entry stage, there will not be much information to show.
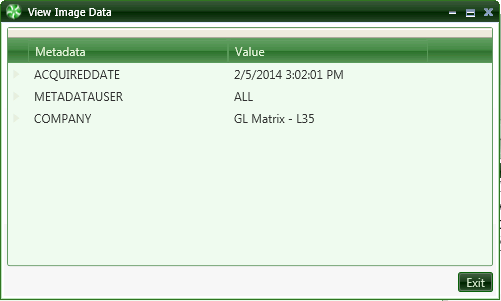
L. View Image Data: Displays information about the Image.
M. Retain Image Size: If you increase or decrease the size of the image, you can use this option to maintain the Image Size for all your invoices to approve.
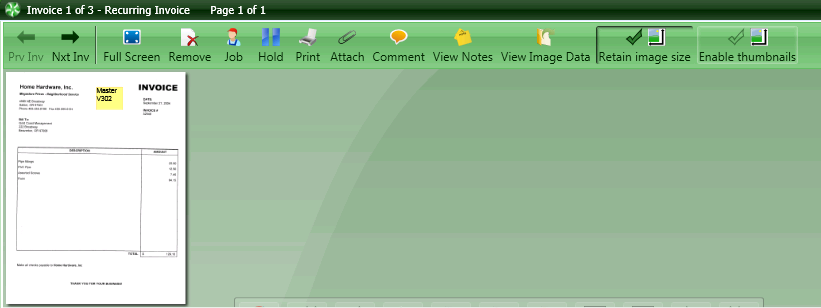
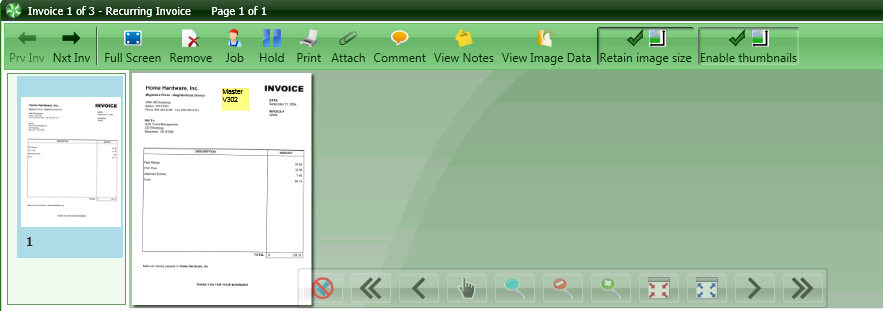
N. Enable Thumbnails: If you do not wish to see the thumbnail images to the left of your screen you can turn it off.
Thumbnails off
Thumbnails on
Bottom of Screen Buttons and Controls
Joint: This will allow a joint payee to be entered to an invoice as in Sage Timberline Office Accounts Payable.
List…: The list button performs the same function as the [List…] button in Sage Timberline Office Accounts Payable.
Calculate: This performs the same function as the [Calculate] button in Sage Timberline Office Accounts Payable.
Commitment: If you’re working on a commitment this button will be highlighted. Pressing this will display a commitment report.
Cancel Distribution: Is used when data has been entered to the distribution grid, the caption of this button becomes Cancel Distribution and pressing it will clear this grid and change the caption to Cancel Invoice.
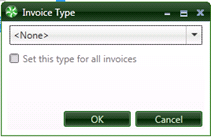
Chg Type: If this button is displayed, pressing it will allow the operator to assign or change an invoice type for an invoice. The down arrow displays all the user defined Invoice Types.
Delete Row: Pressing this button will delete the highlighted distribution row.
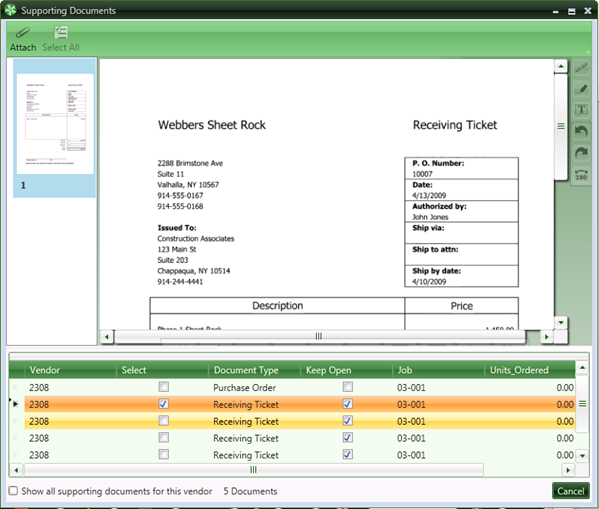
Support Doc: The Supporting Document button will be highlighted if there are supporting documents matching the vendor/job/commitment or vendor/property coded to the invoice. Clicking on this button will display the supporting documents. The operator will choose any supporting documents that needs to be associated with the invoice
Note: If the operator forgets to select Supporting Documents, TimberScan will automatically display any supporting documents for that vendor.
History: This button will display the vendor’s history including all invoices in Timberline as well as all invoices still in the approval process.
Email: The email button causes the TimberScan email form to be displayed. Using this form you can select email addresses from the TimberScan user list, Sage Timberline Office address book or Outlook contacts. A copy of the current invoice will be converted to Adobe Acrobat PDF format and automatically attached to the email by default unless they Include Invoice checkbox is unchecked.
If a copy of the email is required for the user’s records, checking the Cc My Email Account checkbox will cause a copy to be sent to the user’s inbox.
Prev Inv: Will allow you to work on the previous invoice in the batch
Nxt Inv: Will allow you to work on the next invoice in the batch
Approve: Records the invoice as approved. You will still be able to go back to modify the invoice even if needed.
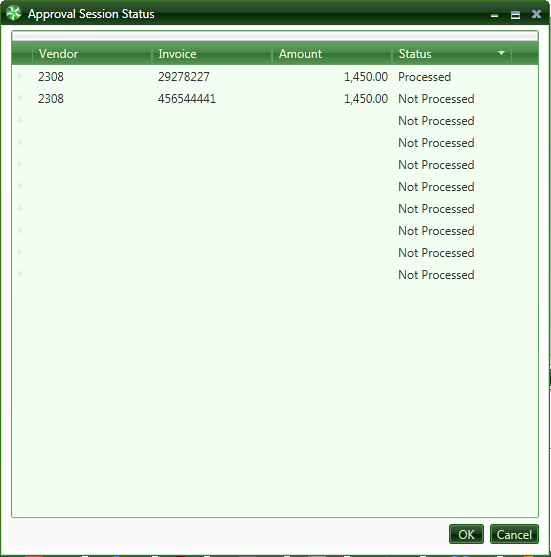
Finished: Completes the batch. It will display a list of all invoices in the batch and will highlight the ones that have been accepted. Select the Commit button to route the invoices to the next level.